Difference between revisions of "Switching power with IFTTT"
(→IFTTT) |
|||
| (4 intermediate revisions by the same user not shown) | |||
| Line 1: | Line 1: | ||
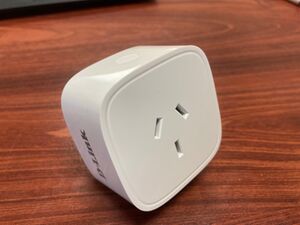
In this activity, we will switch a power plug on and off using the IFTTT. Before we get started, a quick word of safety. I have been very very careful to not expose any electronics greater than 5V USB or a 9v battery. In this lab we will only interact with the 240v power plug through an app. We will just treated it as a regular powerplug, except that the switch is now internet controlled. You must take this mindset, of never ever touching anything 240v. Your life, as well as the life of others around you depend on this. With any electronics that you interact with, if you don't understand something, don't touch it and contact an electrician. | In this activity, we will switch a power plug on and off using the IFTTT. Before we get started, a quick word of safety. I have been very very careful to not expose any electronics greater than 5V USB or a 9v battery. In this lab we will only interact with the 240v power plug through an app. We will just treated it as a regular powerplug, except that the switch is now internet controlled. You must take this mindset, of never ever touching anything 240v. Your life, as well as the life of others around you depend on this. With any electronics that you interact with, if you don't understand something, don't touch it and contact an electrician. | ||
| − | [[File:Dlink_powerplug. | + | [[File:Dlink_powerplug.jpg|right|thumbnail| Our Australian 240v powerpoint]] |
| − | + | == Getting Started == | |
| − | To get started, | + | To get started, unbox your d-link power plug and followed the instructions provided to connect it to your WiFi network. |
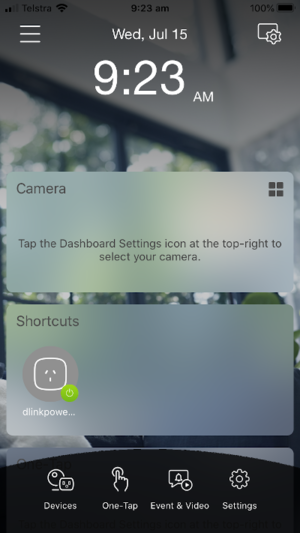
| − | [[File: | + | [[File:Dlink_app.png|right|thumbnail| Follow the link instructions until you reach this point]] |
| + | Once you have your power plug setup you should be able to switch it on and off via your smartphone as shown on the right. | ||
| − | + | == IFTTT == | |
| + | |||
| + | Once this is done we will set a trigger to turn the power plug on and off based on the time of day. | ||
| + | |||
| + | Go to https://ifttt.com/create and then sign in. Then click on this. | ||
| + | |||
| + | ==== This ==== | ||
| + | |||
| + | Then search for "Time" and Click on the date and time service. Then click connect and select your timezone. | ||
| + | |||
| + | Now we chose when you want the time to fire. I selected "Every day at" and then specified a time about 5 or 10 mins ahead. | ||
| + | |||
| + | ==== That ==== | ||
| + | |||
| + | Now we will configure "That". Click on "that". | ||
| + | |||
| + | Then search for "dlink" then click on "D-Link Smart Plug", then connect. | ||
| + | |||
| + | Provide your Dlink login details. | ||
Latest revision as of 03:44, 15 July 2020
In this activity, we will switch a power plug on and off using the IFTTT. Before we get started, a quick word of safety. I have been very very careful to not expose any electronics greater than 5V USB or a 9v battery. In this lab we will only interact with the 240v power plug through an app. We will just treated it as a regular powerplug, except that the switch is now internet controlled. You must take this mindset, of never ever touching anything 240v. Your life, as well as the life of others around you depend on this. With any electronics that you interact with, if you don't understand something, don't touch it and contact an electrician.
Contents
Getting Started
To get started, unbox your d-link power plug and followed the instructions provided to connect it to your WiFi network.
Once you have your power plug setup you should be able to switch it on and off via your smartphone as shown on the right.
IFTTT
Once this is done we will set a trigger to turn the power plug on and off based on the time of day.
Go to https://ifttt.com/create and then sign in. Then click on this.
This
Then search for "Time" and Click on the date and time service. Then click connect and select your timezone.
Now we chose when you want the time to fire. I selected "Every day at" and then specified a time about 5 or 10 mins ahead.
That
Now we will configure "That". Click on "that".
Then search for "dlink" then click on "D-Link Smart Plug", then connect.
Provide your Dlink login details.

