Running the Raspberry Pi as a Bluetooth Peripheral
In this activity, we will set up the Raspberry pi to run a Bluetooth service as a peripheral device.
Contents
Updating and installing the packages
Update your Raspberry Pi with:
sudo apt update
And then
sudo apt upgrade
We will now install the requirements for pybluez
sudo apt install python3-pip libbluetooth-dev git
We will then install the python packages:
sudo pip3 install pybluez RPi.GPIO
We are now going to modify the Bluetooth Service in the Raspberry Pi to turn on the Bluetooth service.
sudo nano /lib/systemd/system/bluetooth.service
Thet change the following line:
ExecStart=/usr/lib/bluetooth/bluetoothd
To
ExecStart=/usr/lib/bluetooth/bluetoothd -E
The -E flag enables experimental features. After adding the experimental flag to the raspberry pi we need to reboot the pi to enable this feature.
sudo reboot
After you have rebooted, log back into your Pi and return to the terminal.
Now we will use Git to download a package that has been written and use a modified version of one of the files to enable and disable a LED over Bluetooth.
git clone https://github.com/jay-donovan-murdoch/cputemp
cd into the folder we just downloaded on git
cd cputemp
Modifying the code
Edit the python3 script:
nano LEDscript.py
Then edit the code below. Ensure you change the text "IoT Murdoch" to a service name that is unique (otherwise you might connect to someone else’s pi by accident).
#!/usr/bin/env python3

#Python GATT server example for the Raspberry Pi
#Copyright (c) 2019, Douglas Otwell
#Distributed under the MIT license http://opensource.org/licenses/MIT


#BLE requiremetns
import dbus

from advertisement import Advertisement
from service import Application, Service, Characteristic, Descriptor

#GPIO Access
import RPi.GPIO as GPIO


GATT_CHRC_IFACE = "org.bluez.GattCharacteristic1"
NOTIFY_TIMEOUT = 5000

class LEDControlAdvertisement(Advertisement):
    def __init__(self, index):
        Advertisement.__init__(self, index, "peripheral")
        self.add_local_name("IoT Murdoch")
        self.include_tx_power = True

class BLEService(Service):
    MAIN_SVC_UUID = "00000001-710e-4a5b-8d75-3e5b444bc3cf"

    def __init__(self, index):

        Service.__init__(self, index, self.MAIN_SVC_UUID, True)
        self.add_characteristic(LEDControl(self))


class LEDControl(Characteristic):
    UNIT_CHARACTERISTIC_UUID = "00000002-710e-4a5b-8d75-3e5b444bc3cf"

    def __init__(self, service):
        Characteristic.__init__(
                self, self.UNIT_CHARACTERISTIC_UUID,
                ["write"], service)
        #self.add_descriptor(UnitDescriptor(self))

    def WriteValue(self, value, options):
        output = bytes(value).decode()
        if output == "0":
            print('turning LED off')
            GPIO.output(26,GPIO.LOW)
        elif output == "1":
            print('turning LED on')
            GPIO.output(26,GPIO.HIGH)
        else:
            print('try again')
            print(output)


#GPIO setup
GPIO.setmode(GPIO.BCM)
GPIO.setwarnings(False)
GPIO.setup(26,GPIO.OUT)

app = Application()
app.add_service(BLEService(0))
app.register()

adv = LEDControlAdvertisement(0)
adv.register()

try:
    app.run()
except KeyboardInterrupt:
    app.quit()
The UUID which reads "00000001-710e-4a5b-8d75-3e5b444bc3cf" is a random identifier that you can generate here https://www.uuidgenerator.net/ general practice is for each characteristic under it to change the service UUID up by one.
128 bit identifiers are able to be used by anyone, you may see shorter ones on other devices these are locked to a specific vendor or a specific service e.g battery levels are 0x180F
Read more here https://www.bluetooth.com/specifications/gatt/services/
Now run the script
sudo python3 LEDscript.py
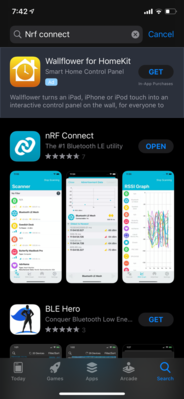
To connect we will use our mobile phone, download the app nRF Connect. This as available:
- Android: https://play.google.com/store/apps/details?id=no.nordicsemi.android.mcp&hl=en_AU
- iOS: https://apps.apple.com/au/app/nrf-connect/id1054362403
Using nRF Connect
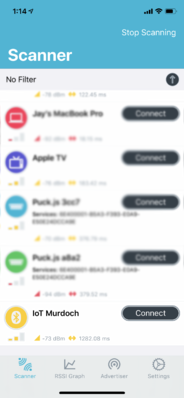
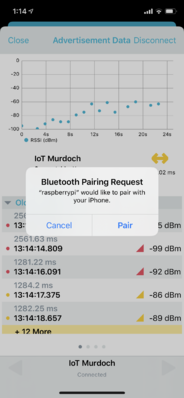
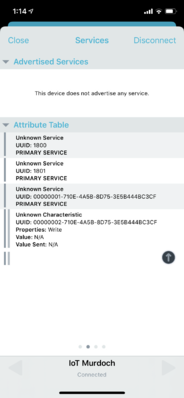
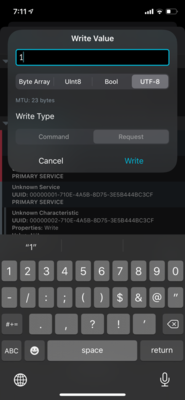
Once open, search for the name you chose as a replacement for "IoT Murdoch" it will ask you to pair, swipe across to services in the app, then click the up arrow under your service
Then write into the service ensuring you select UTF-8 at the top, 1 means LED on, 0 means led off
You should then see the command line tell you that the LED is enabled, and it switch on
Wiring up the Pi and LEDs
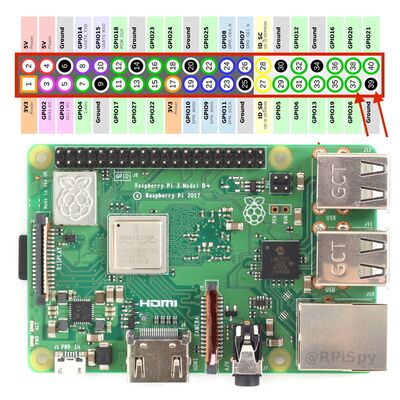
In the code above we have set the script to use GPIO port 26 (37) and then use any ground port of the Raspberry Pi in our example, we will use port 38.
The code above will turn on the port when 1 is written and turn off the LED when 0 is written.
Connect these header pins to a breadboard with jumper wires. Then connect the LED to the breadboard ensuring that the polarity of the LED is correct. LEDs have to be connected in the correct way, the longer lead is the positive side and the shorter lead is the negative side.

Now run the script again and connect using nRF connect and see if the LEDs will now turn on and off.
sudo python3 LEDscript.py
