Install Raspbian on the Pi and basic networking
In this activity, we will show you how you can get started with your Raspberry Pi. Some of you may have done this before and there are easier ways to do this. The most simple way to get started with a Raspberry Pi is to buy a pre-installed sd card running NOOBS. You can then plug in a monitor, keyboard and mouse.
The aim of this unit is to teach you some fundamentals of IoT device, so it is important that you can use a serial connection on an IoT device which may not have an Internet connection. Secondly, we have devised an IoT and a unit with no additional assumptions above a laptop and a phone. So we are assuming that you don't have a spare keyboard, monitor and mouse available.
Contents
Downloading and Flashing Raspberry Pi OS on an SD Card
Download the Raspberry Pi imager: https://www.raspberrypi.org/software/
Insert your SD Card, into your USB-SDcard reader. Then insert the USB-SDcard reader into your computer.
Open the Raspberry Pi imager on your computer. Click Choose OS and pick the recommended version.
Then Click choose storage. Note the capacity of your purchased MicroSD card and ensure that you are flashing a device with the same capacity. Note that the number on the box will slightly overestimate the actual capacity. I purchased a 16GB MicroSD card and Balener Etcher reports it as a 15.5GB MicroSD card. After this, click flash and enter your password if required.
Enabling SSH and setting up the WiFi
At this point, we have our SD card flashed. If we wanted we could plug in a keyboard and monitor. You could use a screen, keyboard and monitor to enable ssh and configure your Raspberry Pi to connect to your wifi network but we are going to assume you don't have these.
We are going to enable ssh and connect your raspberry pi to your WiFi network prior to booting into it. So we are making modifications directly to the filesystem. Start by downloading the following two files.
Note, yes ssh is a blank file. Now you should go and edit the wpa_supplicant.conf file with your SSID and key.
Once you have edited, saved and closed wpa_supplicant.conf you should drag and drop ssh and wpa_supplicant.conf from your computer and into the boot directory on your USB drive.
You can now safely eject your USB drive, remove the SD card and insert it into your Raspberry Pi.
Logging into the Pi
You should now plug the USB cable into your raspberry pi to boot it up. We are going to remotely ssh into the Pi but first we need to find its IP adress.
To find the IP address of your Raspberry Pi, you should ensure that your computer is connected to the same WiFi network as the credentials that you entered into your raspberry pi.
To find your raspberry pi, there are two different methods that you can choose between.
Method 1: Install Nmap on computer and scan
With this method we will scan the subnet with nmap. You can download nmap, for any operating system, here: https://nmap.org/download.html
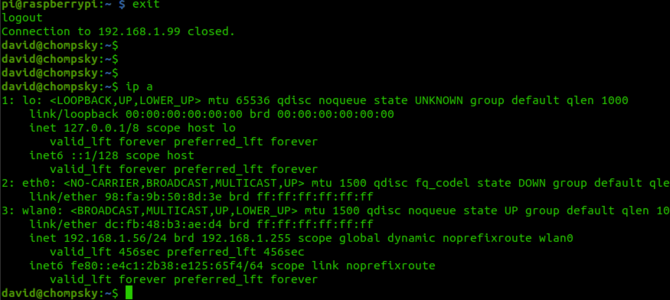
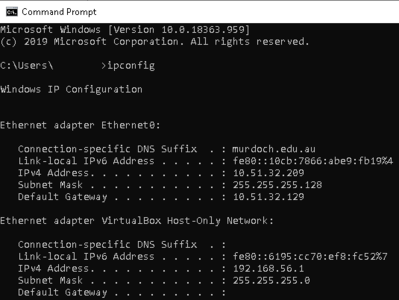
Now you want to find out the IP address of your LAN. Open up a command line/terminal and find out your IP address.
- Windows: Click on the start menu and then type command. You should then be able to open a command prompt. Open it and type:
ipconfig
- MacOS and Linux: Click on the launcher and search for your terminal. open it and type:
ip a
Record your Ip address.
Now open nmap and scan the network. Under target, if your computers IP address was 10.0.0.56 put 10.0.0.0-255. If your computers IP address was 192.168.1.101 the target should be 192.168.1.0-255.
After the scan has been completed, you should look through the output and identify the IP address of the Raspberry Pi.
SSH access to your Raspberry Pi from your computer.
You should now try to ssh into your Raspberry Pi.
On MacOS or Linux, open a terminal and type:
ssh pi@[ip_address]
On windows install and open [Putty] and then put the IP address in the box that says hostname. The default password for your raspberry Pi is:
raspberry
Once you have logged in you should immediately set a strong password with:
passwd
Update your Pi via apt
You can
sudo apt update
Then:
sudo apt upgrade
To update your pi.
Expand the filesystem
You should expand the filesystem to use the entire SD card capacity. On the CLI type:
sudo raspi-config
Then use the keyboard to go to Advanced Options->Expand the Filesystem.
You will need to reboot afterwards.
Challenge SSH keys
Can you get SSH Keys working on the Raspberry Pi? Can you SSH from your Linux Virtual machine into your raspberry pi without any passwords?
Some instructions here
Free time
If you find yourself with free time, then please work through Linux MOTD for your system.

