DNS via Route53
Contents
Overview
In this week's lab we will:
- Set up a basic web server as a Virtual Machine using Amazon EC2, this will be revision from last week.
- Acquire a domain name.
- Configure a DNS server (Amazon's Route 53).
A major objective of this exercise is to develop familiarity with the components that make up an "Internet Presence". A further goal of this unit is to empower students to build within the Internet rather than merely use it. You will only fully realise the objectives of this lab if you have total administrative control over your virtual machines and your domain name. At this point in the semester, we strongly recommend that students have their own Amazon EC2 account and purchase a domain name.
In this lab, we will acquire and configure a domain name through Route53. Keep in mind that these are separate and can be done through separate providers. In this lab, we are doing it through the same provider to both simplify the process as well as prevent students from undergoing any further credit card entry and validation processes. If you already have a DNS name that you own and wish to use. Please read the instructions at the alternate DNS lab.
Launch an Ubuntu Machine in EC2
Launch an Ubuntu machine in the Amazon EC2 cloud. Ensure that you open SSH, port 22, and HTTP, port 80, in the firewall. If you are unsure or need to redo please see the lab Amazon EC2 Web Services.
The configuration of the virtual machine is not the focus of this lab. We recommend that you keep it simple so that we can move past this "revision element" and on to the substance of the lab. If if you are lacking confidence in setting up a virtual machine, then redo the existing Amazon EC2 Web Services lab and commit some serious time to build your confidence.
If you are completing this lab at home or on your own, follow the steps for last weeks lab. Once your cloud-based virtual machine is configured and running in Amazon EC2 you should ssh into the server and install the Apache webserver as follows:
sudo apt install apache2
- Record the Public IP Address of your virtual machine in Amazon EC2: _________________________________________________
Open a browser and verify that your web server is running at that address. You should see the Apache welcome page. Do not continue with this lab until you have reached this step.
Acquire a Domain Name
For this lab you will need to acquire a domain name:
- Give consideration as to whether this is likely to be something that you intend to maintain in the longer term.
- Do you want to pay to have your address details concealed?
- Which TLD?
Log into your amazon account at https://console.aws.amazon.com. Click services and then Route53.
Click Get Started Now under domain registration. Click register domain and choose both a name and a TLD that fits your budget.
- When I checked the cheapest deal was a .link domain through amazon at $5, this had the added benefit of also providing privacy protection.
- Pick carefully as you will have the domain for a year and you will use this for your final project.
- You will need to enter your details and verify via email to complete the process.
The registration can take hours and you cannot proceed until this is complete. My registration took 20 mins.
Configuring the DNS
- You should already be logged into to Amazon AWS
- Under Services, you should find and select the "Route 53" service (Amazon DNS).
- Create a "Hosted Zone" found within DNS Management.
- Click on the domain name that matches the domain name you just purchased.
- Click on "Create Record".
- Create an Authoritative entry (A record) for your domain name by inserting the IP address you recorded earlier into the value box. Click create at the bottom.
Please leave the TTL at the default value, do not modify this parameter!
Test by plugging your domain name into your web browser. It should take you to the same page as entering your IP address.
Permanent IP address
The IP address assigned to your virtual machine is temporary. When you restart the instance your IP address may change and consequently, your DNS entry will no longer point to your server's address.
The solution is to assign a permanent address (known as an "elastic" address in Amazon AWS terms).
This is optional for this lab but will be necessary for a production server.
Steps:
- In the EC2 AWS console click on "Elastic IPs" on the left side of the window.
- Click "Allocate new address" and then "Allocate".
- Click the select box next to the IP address you just created.
- Use the "Actions" button to associate the address with your instance.
Your IP address will now be permanent and this is the IP address that your Domain Name should point to. You should update the existing A record to point to this new IP address.
Note: An IP address is free while a machine is running. However, you are charged a small monthly fee for reserving an IP address that is not in use.
Testing
Can you now browse to the web site? Can enter your domain name into a browser and reach your page? If not, troubleshoot.
- Is the domain resolving correctly? (ping, nslookup) - Note: ping will not be successful unless a rule for ICMP has been added to the Security Group for your AWS Instance.
Experimenting
- Who issued the certificates for murdoch.edu.au and for csn.murdoch.edu.au? Don't assume they are the same group. Click the lock sign next to the URL to find out.
- Can you create an A record that points to another students server? Or another page on the Internet?
- What happens if you create two A records with the same hostname but different IP addresses?
- Point the host-name at your web server and a public site. Which one is resolved?
- Shutdown your server.
- Does the DNS eventually failover to the second IP address?
- How could this be used?
- Why does it take so long?

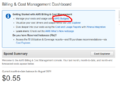
Budgets and Costs - Super Important!
If you won't be using your instance anymore, you may wish to shut it down or terminate (delete) it to decrease the chances of inadvertently running multiple instances and incurring EC2 usage charges. It is easy to launch instances in different countries and not notice them running. Remember that cloud-based services are often billed on the run-time of your server. Be particularly careful if you launch an expensive instance featuring large memory, fast CPUs or GPU processors.
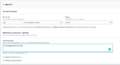
At the most simple level, you want to click on your name in EC2 and go to My Billing Dashboard. See the image to the right. You should be able to reconcile the costs that you see here.
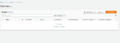
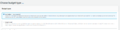
You will also want to set a budget, with an alert as well. Make sure that you follow the slideshow below, to set an actual budget and an alert. To get started click on your name in EC2 and go to My Billing Dashboard then look for the AWS budgets link, as indicated in the first image in the slideshow below. Then follow the text description below the slideshow to setup a budget with alerts.
Click on AWS Budgets (Click on AWS budgets)
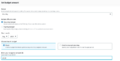
Click on create budget (Click on Create Budget)
Choose cost_budget (Choose cost budget)
set a budget (Set a budget)
set an alert threshold (Set an alert threshold)

click_and_create_the_budget (Click and create the budget)


